Showing posts with label before and after. Show all posts

Tuesday, August 14, 2012

Finally the Right Step

One of the biggest pet peeves about this house when we moved in were the soggy, worn down carpeted stairs...for those of you who saw the before pics of my house, you may remember these:
That picture almost makes them look good. In reality the carpet is sagging off the front, and they are dirty and gross. Trust me. And creaky as well! It is no wonder when the underneath looks like this:

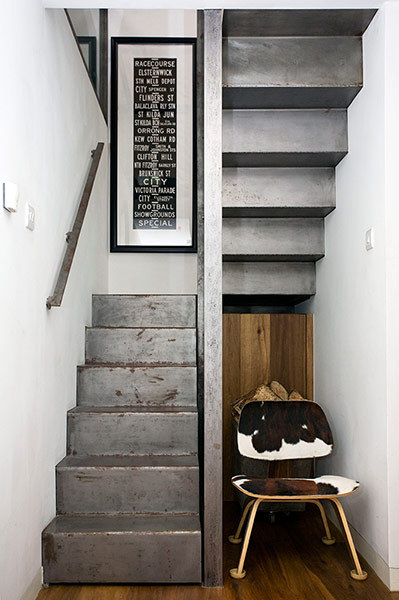
 We were pretty sad to see that they were the original stairs underneath. The ideal circumstance would be to restore the old stairs to maintain character, but most of them are split right in half! (hence the sagging). We found a deal a while back on a tread and riser kit that covers existing stairs instead of taking them off and replacing them. I don't have any beautiful after pictures of them yet, but I can instead leave you with some pretty pictures of creative and beautiful staircases that keep me motivated for the finished product!


I think I may have a new obsession!

Wednesday, May 23, 2012

tarantula

Remember this ugly table, on my to-do list a year ago?
 It was this ugly, marble-y green, but I was in love with the shape. Well it was nice enough this weekend to spraypaint it, so paint we did!


Love the matte look! Now I can't stop thinking about painting my floors white....

Thursday, May 17, 2012

More Fence Progress

When we first started building the fence, we thought we would just close up the one side that was open and dangerous and that would be the end of it. Well, big surprise, the old fence on the other side looked pretty crappy next to our new horizontal fence on the other side:
Pretty ugly, plus a lot of wasted (precious) space, with that weird zig zag. Well I had my doubts at first, but my husband had this idea that if he sold the pre-fab panels on the internet, he would earn enough for the materials for the other side, if we re-used fence posts. Well, what do ya know, it worked!


The fence still needs trim and finishing, and the yard some serious landscaping, but we gained tons of extra square feet so the backyard seems huge compared to what it was before. I can't wait to get it finished, but we are already enjoying lots of time in our new, private space!

Wednesday, May 9, 2012

Handy Hubby, While You've Got Your Saw Out...

Could you pretty please build me these?


A beautiful, modern pergola?


Or a lovely place to sit, with storage? Oh and while you are at it...


Could you paint the siding grey?

Monday, April 23, 2012

To Dos

Spring is here, and we've become aware of our neglected exterior. There is lots to do in the backyard, but I plan to make a few simple changes to the front which will have pretty big impact (I think). Here is my list:
  • Remove "frilly bit" from awning and paint (yes paint!) it matte black. 
  • Paint the shutters and door deep gray
  • Replace numbers with those ones Leila and I found at Re-store last year
  • Replace "country kitsch" mailbox (what, you thought that was my style?)
  • Plant some low maintenance flowers (I'm no gardener)  
I've already decided to go with this mailbox from Morba :
 And I think I may go with Farrow and Ball downpipe:

It looks a lot darker off of the computer, I swear. What do you think? Any more suggestions? I've got to get working!

Tuesday, April 17, 2012

Before and After: Holly's Colorblocked Curio Cabinet

Holly is a huge fan of ponies, so this year at Christmas my parents bought her the fuzzy pony set by Melissa and Doug. It came in this barn shaped wooden packaging that was kind of neat, but Holly in her panic to get the ponies out, ripped out some of the paper scenery.
I thought the shape of the packaging was pretty cool, and the fact that it was wood made it hard to throw out, it seemed like such a waste! So yesterday afternoon I got out some old paint colors from previous projects and worked away at it. What resulted was a cute little display case to place some of those funny little trinkets toddlers like to collect...


My intention is to hang it on the wall for her to rearrange her trinkets herself but I haven't quite figured out where. It was looking great against the walls of my dining room and is making me wish I could re-paint Holly's room! What do you think?

Monday, October 24, 2011

Chair Makeover: Before and After

I have been wanting to tackle this project for a while; unfortunately procrastination (not going to lie!) got the best of me and the fabric sat in my cupboard for quite a while. I probably could have recovered these myself, but the funny thing about being nine months pregnant is that you can convince your husband to do things he would normally put off himself (honestly I am so relieved he was willing, if my present wrapping skills are any indication about my re-upholstering skills, you would know why). So this weekend we took these gross chairs:


From dingy to fabulous!

That mustard colour has become one of my favorites; since the seat padding was in good shape, this whole project cost 13 dollars thanks to some nice, upholstery weight fabric from IKEA! (and the cost of making a cheesecake for my husband, I'm sure). Happy Monday, everyone!

Monday, September 19, 2011

Living Room Reveal!


This is the moment I've been terrified of - letting you actually see larger portions of my house!

Today is the day, though, and I'm feeling quite chuffed because I've finally finished decorating my mantlepiece. Rachel's Mom (garage saler extraordinaire) had a garage sale on the weekend and she was getting rid of a lot of milk glass. I thought it would look nice against my grey walls and I think it works, don't you?

I'm also happy with the stacked wood in the fireplace. It works as a great kid-proofing!

The colour on the walls is Sherwin Williams Gauntlet Grey.

The magazine rack is still only primed because I haven't decided what colour to paint it (orange? pink? What you do you think?).

And here are some more shots:


And here's a before shot when we looked at the house. Obviously, this isn't our furniture or decor! The whole place was painted that beige and the guy in the pic is our realtor.

Monday, September 12, 2011

Bathroom Reno:Phase One

Today is an exciting (and anxiety filled) day for me; the day my tub gets replaced! We decided that the bathroom reno would be a little much for my husband to handle right now with work and a new baby on the way (speed is also an issue-I don't want to spend six months with a new babe and no tub!). Our contractor has decided to do this reno in "phases", this week the tub and surround will be completed. To stay on budget, plumbing stays as is: if this was a forever house I would have probably separated the tub and shower. Of course, there are lots of economical and stylish options out there if you just shop around and keep it simple:
The American Standard "Minimalist" tub is the one we will be going with this time: it is cheap and offers clean lines and a deep soak.
The shower head and faucet will be replaced with a brushed nickel finish. Our contractor recommended Moen because he has had wonderful experience using their products.
This is as far as we have had to buy at this stage, we will be picking out tile today! Without further ado, here are the nasty before pictures (avert your eyes if you dislike slimy mold).


Shallow tub, bubbling vinyl floor, mold, rotten wood...not exactly luxurious; but we were using it! Lets hope I have some progress pictures for you next day!

Wednesday, July 27, 2011

A Vintage Road Bike in progress

I wanted to find a vintage road bike for my husband to ride for fun. He has a very sensible hybrid bike which he uses for year-round transportation (including through the harsh Canadian winter!). He also uses it to tow our kids in the Chariot. But, like lots of people he does like to go fast sometimes. I think it irks him that old men can pass him on the bike trail as his main bike is a total slug.

As I've mentioned before, he's a rather leggy and tall fellow so finding a bike to fit can be a challenge. So I was pretty happy to find a diamond in the rough on kijiji:


Whoa, I hear you say! To say it was a filthy mess was an understatement. But underneath all the grime there was a pretty good bike. Mieles are a Canadian bike company and used to be very high quality. This bike seems to be a mid-range, mid-eighties road bike designed for really going fast. Plus, the chrome forks really do it for me.

So what I did next was a huge learning curve for me and quite a lot of fun. I took almost everything off the frame - the pedals, crank etc. I then took out the bearings and cleaned and greased them. I also got to buy some cool tools, like a crank puller (I think this is the funniest name for a tool ever). I have also been spending way too much time at the bike shop (Rachel's husband's one, natch) watching them work and asking my stupid questions. The thing was so crusted with filth that I had to use a screwdriver to carve the old grease out of the nooks and crannies!

Anyway, it is almost done! Here is what it looked like a few days ago:


Quite an improvement, wouldn't you say? Since then i have added white bar tape. New brake hoods are on the way. But what I really need is a nice white vintage saddle for it.

Stay tuned for the next installment!

Wednesday, June 8, 2011

Turning a table into a chair

Ever since I saw Manhattan Nest's "Tabletop swap" my mind has been a-whirlin' (Sorry for the lack of a clever post title, "chairtop swap" did not seem to work for me). Look at this beauty! Total cost, $45...
You see, I have had these "Saarinen" reproduction chairs and table for over a year now in my kitchen. While I love the table, I have tried numerous times to sell the chairs to an owner that could give them the fix up they need (my husband bought me some Herman Miller chairs for Christmas last year to replace them). They are quite awful to sit on because the base (from a previous fix) has been attached with a piece of plywood, and my kids are always knocking them over and trying to stand on them so I'm afraid they will get hurt...

I know I could breathe new life into those bases but how? side tables? children's tables? And what sort of top? I don't know if I have the luck or the patience to stumble across an abandoned "small" tabletop like Daniel did (have you seen the deals he has "happened upon"? who gets a Bertoia chair for $60????). However I could make one inexpensively because of the size. Marble? plexiglass? reclaimed wood? the options are limitless. What do you guys think? Are they worth the effort?

Thursday, May 19, 2011

Before and After: Henry and Holly's New Playroom

When we moved into this house, there was this odd, tiny room off of the dining room. Because of its size, I couldn't envision anything more than a desk fitting into that space. We recognized that part of the "odd smell" coming from the house was from the old carpet in there, that was covered in dead bugs and animal urine of some sort; so one of the first things we did to the house was rip up this carpet and replace it with some engineered hardwood that I found at a killer deal: 99 cents a square foot! After a fresh coat of paint, it became very apparent that this was one of the cheeriest rooms in the house, and I also needed a place downstairs for the kids to play. It soon became the most perfect, tiny playroom!
Here are the "before" pictures of the space:


 And the afters! Don't mind Holly, she likes to get in any picture she can:


The final picture is the view from the kids window; I think it's kind of fabulous! It is nice to have a place for the kids to play and be close by, and the expedit from IKEA does wonders for keeping both a six year old boy's and a two year old girl's toys organized and contained. It was the first room done, and I would have to say it's my favorite...