Holly is a huge fan of ponies, so this year at Christmas my parents bought her the fuzzy pony set by Melissa and Doug. It came in this barn shaped wooden packaging that was kind of neat, but Holly in her panic to get the ponies out, ripped out some of the paper scenery.
I thought the shape of the packaging was pretty cool, and the fact that it was wood made it hard to throw out, it seemed like such a waste! So yesterday afternoon I got out some old paint colors from previous projects and worked away at it. What resulted was a cute little display case to place some of those funny little trinkets toddlers like to collect...
My intention is to hang it on the wall for her to rearrange her trinkets herself but I haven't quite figured out where. It was looking great against the walls of my dining room and is making me wish I could re-paint Holly's room! What do you think?
Showing posts with label chalkboard paint. Show all posts
Showing posts with label chalkboard paint. Show all posts
Tuesday, April 17, 2012
Monday, February 27, 2012
I Think I'm a Little Obsessed Now...
I can't help myself. I know I'm not the only one who thinks matte black is one of the sexiest colours of all time. So when I kept looking at this one dollar garage sale bowl which has been acting as a space filler on my sideboard (I really can't stand the finish of it), my mind was battling between sending it on the next Goodwill trip and painting it.
Thanks to some leftover chalkboard paint, painting won...
That is one sexy bowl. You'll have to excuse me now as I go look for other stuff to cover with chalkboard paint.....
Thanks to some leftover chalkboard paint, painting won...
That is one sexy bowl. You'll have to excuse me now as I go look for other stuff to cover with chalkboard paint.....
Labels:
accessories,
chalkboard paint,
repurposing,
thrifting
Thursday, February 23, 2012
Black
Classic, timeless, it grounds the space...
I really like this look and would like to incorporate more of it into my home...Perhaps a little fun with paint is in order...
Thursday, July 14, 2011
Henry's "Industrial Cool" Corner
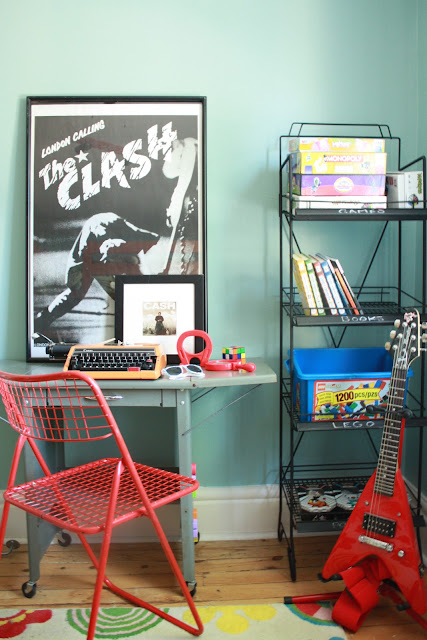
I have talked about my love for the industrial look for children's rooms in the past; while I couldn't see this look for Holly, Henry has always had that rebellious, rock and roll attitude that suits this look perfectly. With his new shelf painted with chalkboard paint, we decided to do some re-arranging (mostly because Henry wanted to impress his Grandma, who visits today). Here it is!
I absolutely love the size of that industrial desk (the sides also fold down to fit into little corners). The vintage chair relates to his red shelves on the other side of the room...
And yes, that is a mini flying V! Henry has loved music all of his life (the faster, the better!). I think this look suits him perfectly. Everything (except for some of the toys) was thrifted as well. Here's the breakdown:
Desk: $10, garage sale
Chair: 2 for $5, already red!
Shelf: free (side of the road), spray paint and chalkboard paint left over from other projects
Typewriter: $2, garage sale
Art: Cash print, gift from grandpa, Clash poster from Henry's Mom's first apartment.
What do you think?
Monday, May 9, 2011
IKEA hack: create a built in look for your fridge using IKEA cabinetry.
As you may know already, we used IKEA for our kitchen. Our fridge was not continuous with the cabinetry but we wanted that "built in" look. We were ready to use the $150 panel you can pick up from IKEA, but it seemed like we could save more money; as well the panel had a cheap shiny look to it I was not wild about. So we went with our good ol' friend plywood instead! After affixing the cabinets to the wall using the track system, and cutting a piece of plywood the depth of the fridge, we attached it "good side" out to the cabinetry. We were then left with this:
We then used extra trim panels from IKEA to fill in the space between the cabinets and the fridge, and some quarter-round to finish off the edge of the plywood. I knew I wanted to incorporate a chalkboard somewhere in the kitchen, and this seemed like the perfect spot! I wanted it to look "finished", so my husband picked up some trim to frame it in:
A few coats of CC-40 by Benjamin Moore and some chalkboard paint and it looks like the fridge was meant for that spot! (a quick tip; CC-40 is almost an exact match to IKEA cabinetry! We even saved more money by using a 7.99 tester quart from Sherwin-Williams that we colour matched)
Subscribe to:
Posts (Atom)


