I apologize in advance for the crude photography; most of these meals were made at night and frozen! I am no chef, this menu is geared towards simplicity and picky eaters, so here goes:
Breakfasts:
Eggs or Pancakes and Bacon, cereal, fruit
Lunch:
Dogs and burgers, hummus and veggies, etc
Pre-frozen easy to make pasta (see recipe below). To make this simpler you could even make the noodles ahead of time, but I prefer to boil the noodles at the campsite and heat the sauce.
Dinner x 2:
Both of these dinners are pre-cut, wrapped in foil and frozen. Just throw on coals in campfire for 40 minutes (check to make sure) for meat dishes and half hour for veg:
1.Steak with roasted potatoes and vegetables:
We took the simple route, precut the vegetables and potatoes and wrapped them in foil with olive oil and seasonings (we used Cajun).
2. Fajitas:
Almost the exact same, precut veg (and chicken this time), cumin, chili powder, crushed red pepper and chipotle sauce, oil and fresh squeezed lime. Wrap in foil and throw on hot coals! We even pre-grated cheese, but we will assemble at the site.
Easy Sausage Pasta:
This recipe is very flexible; I have used more vegetables and fresh ingredients in the past but was in a time crunch:
Step 1: Brown sausages on medium-high heat, set aside.
Step 2: Chop garlic and onion, sauté in olive oil on medium heat in the same pan (save dishes!). Add peppers and other vegetables, fresh basil, oregano or whatever you have! Sometimes I add some heat with chili peppers, sauté for an additional 5 minutes.
Step 3: Drain and add 1 can diced tomatoes, slice and add your sausage, cover and simmer for an additional 10-15 minutes. Serve over your favorite pasta!
This recipe uses 2 dishes 2 utensils to make, I think that's why I like it so much. After it cooled we poured it into a freezer bag and froze it for camping. Enjoy your holidays this weekend!
Thursday, June 30, 2011
Wednesday, June 29, 2011
A Gift for a Special Little Girl
My friend Katie had her second child just over a year ago. The lovely Quinn was born with a Congenital Diaphragmatic Hernia (CDH) and she had to endure a huge operation as a tiny tiny baby. We were all terrified she wouldn't survive. If you want to read more about her story, you can here.
Katie and I met through a local babywearing group and became fast friends. Our oldest children are the same age and we also shared a love of wrapping our kids. So when Quinn's birthday approached I knew I needed to make her something special.
As with many strange sub-cultures, wrappers are a funny bunch. We sit on our computers discussing the pros and cons of long lengths of purposely woven fabrics. We weigh, measure, and argue about which blend of natural fibres is "cushier", "more supportive", "floofier". And there are limited edition runs of some wraps and if they are deemed to be good, they can sell for over $500. My main wrap has appreciated in value to well over $300 in the few years I've owned it.
The owl stuffie above is made from a piece of a Didymos wrap - a Green Colourgrown Indio, to be precise. It's organic (of course) but the really neat thing is that the darker green threads aren't dyed - it's cotton that is naturally a greeny colour! This makes for honestly the softest fabric I have ever felt. Much softer than most silks because it's thicker and floofy (yes, floofy).
I hand felted the eyes and beak from some roving and used a piece of the roving for the ear tufts. I hope Quinn loves cudding it.
Tuesday, June 28, 2011
Thrifting: Spraypaint Edition
Hello friends! I need your help; my shed is full of stuff like this, and my husband says it may end up at the curb if I do not decide what to do with it!
This funny contraption was found in the garbage one night by my parents (I must have inherited it from somewhere, right?). It must have come from a variety store to hold candy, but I was thinking it could make a cute toy shelf or a place for books. It has that cool industrial vibe I love for Henry's room...What do you think: bright red? pop-y yellow? orange? chalkboard perhaps?
Next is this lovely little table; I got two of these (one is smaller but the same) for $5. My husband insists they are the ugliest things he has ever seen, but they stole my heart from the moment I saw them! This bigger one has the perfect spot beside my couch and the smaller in front of it. After priming the large one, I almost feel glossy white may be a cool option, and pink or yellow for the little one? Still trying to gain some colour in that living room...
Finally, these mid century outdoor chairs. I absolutely love these. Can not for the life of me decide on a colour though.
What do you guys think? I would love to get a little bit crazy with them and I love colour at the moment. Send me your suggestions!
Monday, June 27, 2011
Camping in Style
Along with some other families, Rachel and I are going camping this weekend. We're pretty bare bones campers and don't have a lot of extras but I've spent a bit of time lusting after certain things. Here's my pick of camp heaven:
I was given one of these as a child but never used it. I suppose my parents thought using lighter fuel might be a bit dangerous or something...
But it has a lovely smooth quality to it and now I wish I still had it!
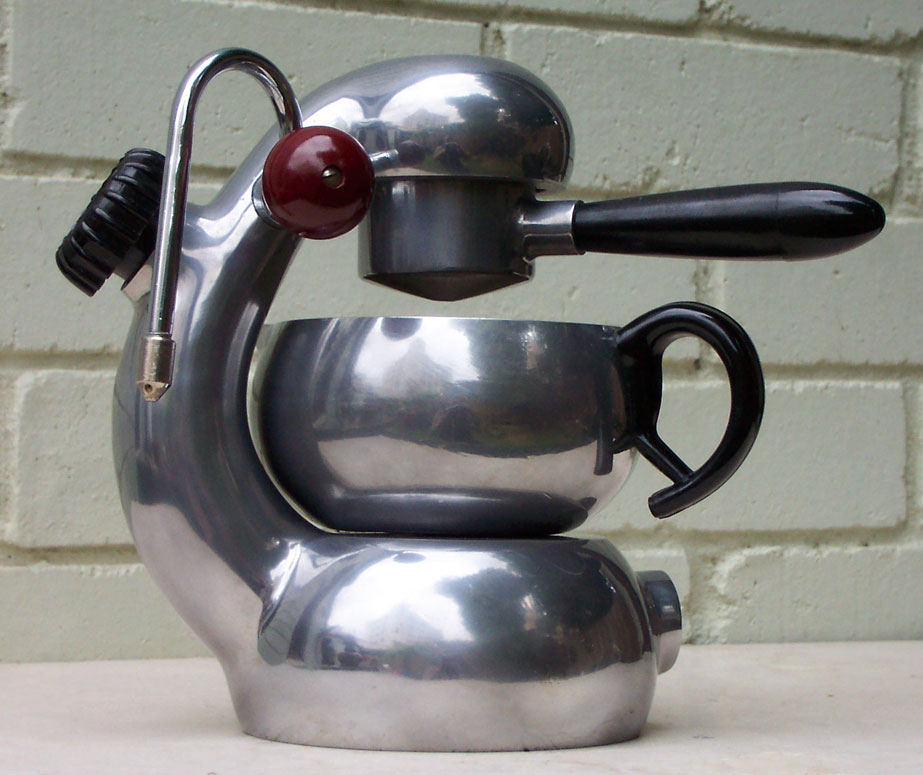
The classic Atomic Coffee maker is the perfect thing to take camping. Seems as though they were very popular in Australia, judging by my sightings there and by the location of them on Ebay. I'd love one, but they're pretty collectible nowadays.
It might look like a compost bin, but actually it's a Billy - a classic piece of Aussie camping kit. It's used exclusively for boiling water for tea and coffee. To make tea in it, you boil the water, then put loose tea leaves in it and then perform a very scary but impressive feat - swinging the billy. This is where you swing the billy full of boiling water around and around (as though you were bowling but all the way around) without actually burning yourself. There are several videos of this on youtube, but they are way to cheesy to post here!
Cute sleeping bags. No explanation needed!
Do you, like us, forgo style in favour of practicality when you camp or do you match your camping gear to your uber-stylish home life?
 |
| Peacock Hand Warmers |
But it has a lovely smooth quality to it and now I wish I still had it!
 |
| Tim Blair |
 |
| Kelly's Camping |
It might look like a compost bin, but actually it's a Billy - a classic piece of Aussie camping kit. It's used exclusively for boiling water for tea and coffee. To make tea in it, you boil the water, then put loose tea leaves in it and then perform a very scary but impressive feat - swinging the billy. This is where you swing the billy full of boiling water around and around (as though you were bowling but all the way around) without actually burning yourself. There are several videos of this on youtube, but they are way to cheesy to post here!
 |
| Glam Camping |
Do you, like us, forgo style in favour of practicality when you camp or do you match your camping gear to your uber-stylish home life?
Friday, June 24, 2011
Chevron Love
While I have noticed a trend of DIY chevron patterns online lately (painted walls, painted carpets, stencils galore!), I am not sure if I could commit to that graphic of a pattern in a large scale on the walls. It is the more subtle, classic chevron (or herringbone, very similar) patterns that I have been dreaming about, underfoot!
Desire to Inspire
Yes, with the bathroom renovation on the horizon floors (or tiles!) have been on my mind lately! I love the look of chevron on the floor, in all types of materials; from wood...
To painted...
And of course, tile...
The last picture is actually 12 by 12 tiles cut in half; a genius idea I wish I stumbled upon while doing my kitchen renovation, very cost effective (longer tiles are more expensive). I have already purchased tile at under 1 dollar a square foot for my bathroom (yay, habitat re-store!) and I am thrilled that it is a rectangular shape so I can play with this pattern!! Now if I can only convince my husband it is a good idea......
Thursday, June 23, 2011
Delicious Brownies
Who doesn't love brownies? Last week, my friend Katie fed me some of her amazing Cookie Dough Brownies. I couldn't stop thinking about them. But with Emmett's newly diagnosed Peanut Thing, I didn't want to use the choc chips I already had in the house. Step in, Best Brownies Ever.
The Last Brownie Recipe You'll Ever Use
Adapted from the Joy of Cooking (75th Anniversary edition)
What you'll need:
- 1/2 cup butter (115g)
- 4oz unsweetened chocolate (yes, unsweetened. No sugar whatsoever. Sorry, but I've never seen it outside North America)
- 4 eggs
- 2 cups sugar
- 2 tsp vanilla
- 1 cup all purpose (plain) flour
Melt the butter and chocolate over low heat (you don't need a double boiler). Then, once it's all melted, let it sit to cool until about room temperature. Don't be like me and lick the spoon. Despite it looking luscious, the total absence of sugar renders it quite revolting.
Then beat your eggs until they are fluffy, preferably using a stand mixer or your muscles if you're feeling energetic. Gradually add the sugar and vanilla and keep on beating until it's a lovely, pale smooth deliciousness. Then pour in your chocolate beat it well. Now that your wooden spoon and fold in the flour using as few strokes as possible. We don't want to develop the gluten in the flour by over-mixing. Gluten development = tough brownies = sad me.
Now pour your batter into your prepared pan, but don't scrape the bowl out. That's for licking. Bake for about 25-30 mins (while licking the bowl) or until it's no longer jiggly and a toothpick comes out of the centre with a few crumbs sticking to it. Let it cool in the pan.
Now try not to eat the entire pan.
Wednesday, June 22, 2011
A Lovely Switch
I'm afraid I have no elaborate before and after pictures today; the work on the kitchen ground to a halt this weekend to enjoy a sunny father's day and some strawberry picking! I did however convince my husband to switch out our light fixture for something a little less......well, this:
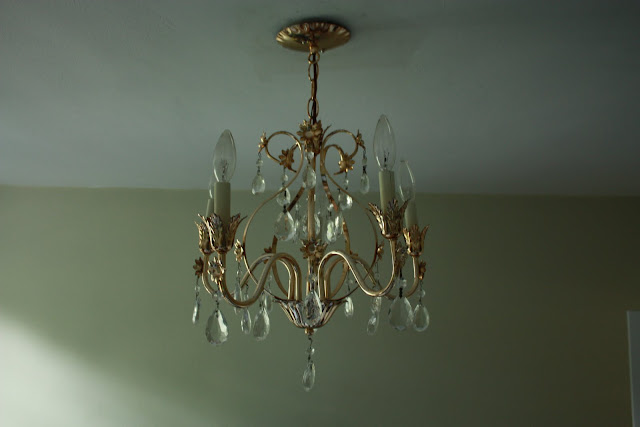
Not only was it ugly, but neither the light nor fan was functional! So what replaced it? That pretty $10 chandelier I purchased garage sale-ing last weekend...
Not only was it ugly, but neither the light nor fan was functional! So what replaced it? That pretty $10 chandelier I purchased garage sale-ing last weekend...
So much better! I managed to suppress the urge to spraypaint this one. I kind of like the colour. Am I crazy?
Tuesday, June 21, 2011
A Gift from the Garden
I always like to take a small gift when I go and visit someone and I try to bring something homemade. For some of the year it's some homemade jam and often it is some baked goods. The other day I was visiting two houses and hadn't had time to bake anything. I couldn't think of anything to take!
I take our herb garden for granted. We love having fresh herbs all year. We have an ever spreading patch of Oregano, Chives, and Thyme in the back and the typical case of mint taking over in our front! We also grow some Rosemary, Sage and Thyme in a large pot and bring them inside for the winter. Last year it lasted all winter with the Sage and Thyme dying just as our outside herbs were coming back. Great timing! We also grow Basil outisde every summer and make huge batches of Pesto to freeze.
Sorry for the digression.
What I ended up taking was a small bunch of freshly picked Thyme, Oregano and Mint tied with some Baker's Twine. I felt a little sheepish bringing such a puny token and I felt sure that the recipients probably had herbal abundance, but they were very pleased to receive the little posy (and neither had a herb garden)! Or so they said.
Monday, June 20, 2011
Ultra Feminine Interiors
Maybe it is just me, but there is a trend I have noticed lately; a resurgence of feminine taste in decorating, whether it be in palette (thanks Pantone, for selecting pink as the colour of 2011!), pattern, or materials (Lucite or velvet, anyone?). Which brings the question, if you were given carte blanche, would you dare?
Tufting and chandeliers...A fresh, feminine palate and floral print!
Canopy beds...
Chanel inspired glamor...
Vintage chic and pink...
Soft drapes and venetian mirrors! I can't help but fall in love with images like these, maybe this is why I've been craving more mirrors, crystal chandeliers, and pink in my house! The key will be to strike a balance between this love and my love for clean mid-century design. What do you think? can it be done?
Friday, June 17, 2011
Indoor-Outdoor Living
 | |
| Clare Design |
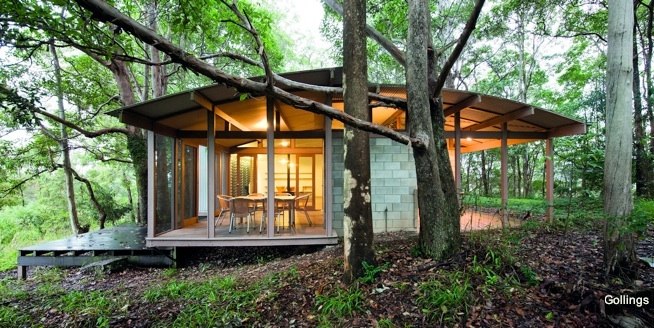
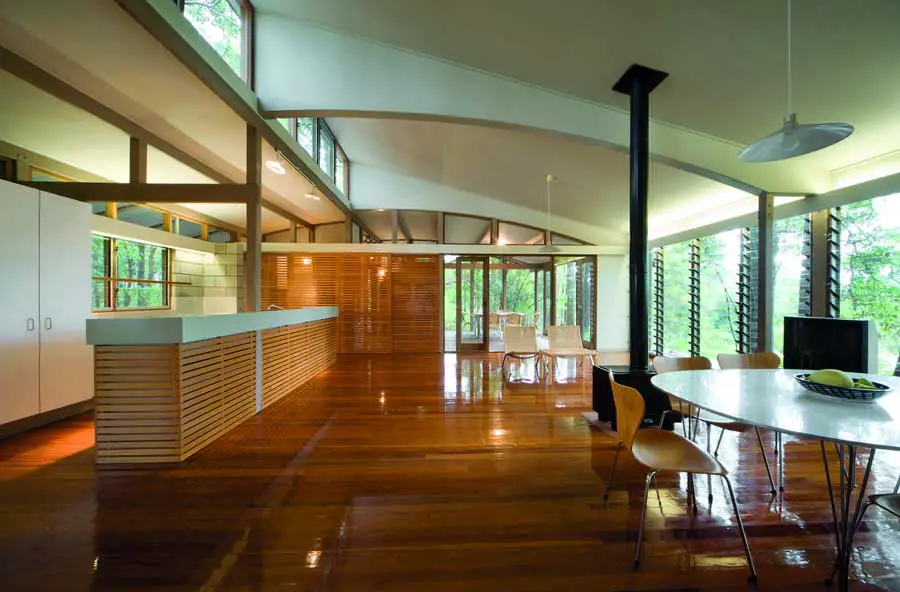
In my former life as an Architecture student in Australia, I really fell in love with buildings that totally blur the border between outside and in. I may get flamed for this, but I think that the Aussies are pretty much the world experts at it. And it totally makes sense as much of Australia has a climate that is conducive to outside living through much of the year (at least compared to North America!).
So I thought I would share the work of some of my favourite Aussie Architects and their outdoor-indoor spaces.
 |
| AIA |
The Kerry and Lindsay Clare's Thrupp and Summer House at the top of the post and directly above is a great example of this style of living. Large sliding doors and louvered windows (try doing this in Canada!!) bring the outside in. Clare Design is one of my favourite firms.
 |
| 1001 Buildings You Must See Before You Die |
 |
| Tzannes Assosciates |
 |
| Marsh Cashman Koolloos |
 |
| Dwell |
Thursday, June 16, 2011
The Great Grout Debate
Yes, We are finally at that point in the kitchen: backsplash! I decided to pick up the tiles the other day so we were prepared when we had a little time. One of my favourite tile shops in London, Budget Carpet and Tile, had a few amazing deals. My husband really wanted the mosaic glass in citron yellow/green, but we are trying to stage for resale, so I felt a classic white was in order. At 3.99 I could have had a hex tile or mini subway tile, but the 1.99 classic subway was too compelling at that price! Which brings me to the question of grout colour. For a long time I felt that white grout was the only option! Now I'm not so sure: Do I go clean and bright?
Or contrasting and dramatic?
What do you think? I need your help to appeal to the masses!
Wednesday, June 15, 2011
A Doll Quilt
 |
I recently made my second quilt, this time for a doll quilt swap. Doll Quilts are tiny quilts, just for wrapping dolls up in!
I absolutely love the quilt blog Film in the Fridge and was inspired for this quilt by her Scattered Mini Blocks Quilt, though I made mine a little more random.
I also love pieced backs, so did a strip across the back:

I don't have a large arm quilting machine, so I did some freehand random crazy quilting and am really pleased with how it looks. I hope the recipient loves it!
This quilt was a great way to use up tiny scraps of favourite fabrics. I'd love to make a bigger version for Emmett when I get around to it. What do you do with your tiny scraps of fabric?
Subscribe to:
Comments (Atom)


