Showing posts with label children's party ideas. Show all posts

Monday, April 30, 2012

A Cake for a Birthday Boy


It was Emmett's birthday last week and we celebrated this weekend. He's a lover of all things chocolate, so I decided to do a chocolate cake. Eleanor told me that he'd want sprinkles (either that or a blue cake), so here we are. It was totally delish.

I used my Sheet Cake recipe in 2 layer pans, reducing the oven temp to 350F and increasing the cooking time to 30 mins.

For the frosting, I did a classic ganache:


  • 1.5c heavy/whipping cream
  • 16oz bittersweet chocolate, grated
We're pretty limited with our choc choices due to Emmett's peanut allergy, so I used choc chips, whizzing them in the food processor to break them up a bit.

Bring the cream to a boil and take off the heat. Dump your grated chocolate in there, stir until mostly dissolved and cover for 10 mins. Stir well until smooth. Now you can choose how to use it. You can pour it as a thin glaze at this point, or let it cool to the desired consistency to either do a thick, poured glaze or a spreadable frosting. Mine was somewhere in the middle. This made a LOT of ganache. Enough to fill and frost this cake with a fair bit leftover for eating with spoons. What's nice is that it's not very sweet so it is a good foil to a typical choc cake.

Tuesday, March 6, 2012

Happy Blog-iversary!

It's hard to believe Leila and I have been working on this little ol' blog for a whole year! It's been an exciting and productive year for the both of us. Let's take a moment to recapture all of the fun moments of the year:

We started off the year with a bang with Leila's popular book sling hack;


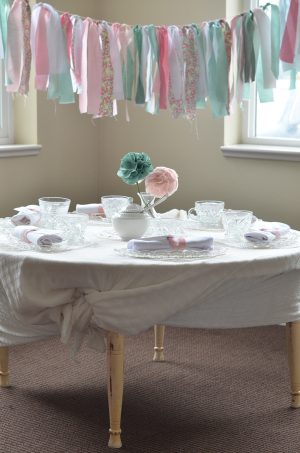
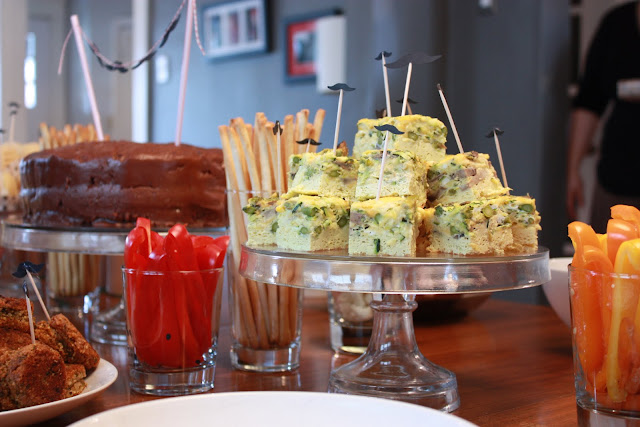
We celebrated with Holly's tea party and Emmett's fabulous moustache party!


I showed you the before and after of Henry and Holly's playroom, also featured on Ohdeedoh; where you can find the DIY play kitchen Santa made for her:


There was lots of thrifting...

and yummy cooking...


some furniture makeovers...


And as always, reno updates!


Thanks to all our friends who read this blog regularly, we love you all. There is still so much to share with you, so we hope you tune in as we continue our blogging adventure!

Thursday, February 2, 2012

Bee-Day Party Ideas

First Day of my Life with You


Emmett's bday is coming up in April and I (obviously) need to uphold a high level of party to keep up with Rachel! I've been thinking quite a bit about themes and the classic Bee theme has caught my eye.

Plus my friend has the hive cake pan above (it's a NordicWare one)! How could I not do it? So I've been Googling like crazy for inspiration:

Russell-life
I LOVE the bee headbands and shirt! What awesome favours! I think I'll have to do this!

A to Zebra Celebrations
Another cool cake and other sweets!

A to Zebra Celebrations
Yes, I know it's not a bee, BUT I could definitely see how you could modify this idea with a bee theme! Adorable! Where do I get those pivoting eyelets?

A to Zebra Celebrations
OMG! These pretzels?!? I think I'm going to do a test run of bee themed ones!

TomKat Studio
And I will leave you with these gorgeous choccies! Wow! So much inspiration!

Monday, October 3, 2011

Sky Lanterns

Oh Happy Day


When Rachel and I were on our last camping trip, a strange thing happened. We were all sitting around the campfire and what appeared to be a small UFO floated across the sky. When it came closer we could see that it was actually a paper (!) lantern with a candle inside.

I was determined to research more on this when I got home and then I forgot. Until Oh Happy Day's post.

You can buy the lanterns (which are actually called Sky Lanterns) here. There is also a neat video on how to light them.

I'd love to buy a whole lot and release them.

Or you can be really crafty and make your own. Confessions of a Fireworks Man has great instructions here, though I think I'd just buy them (they are only about $2 each).

Don't you think this would cool on Halloween?

Friday, September 23, 2011

Girly Parties

I still can't decide what to do about Eleanor's looming birthday. Ideally I'd like to keep it small, limiting it to her best friends. This will make is possible to do some special favours.

Here are some ideas that I've been considering:

flickr via one crafty place
Felt crowns! Wouldn't it be so special to have a personalized one?


Homemade Parties

Given Eleanor's current Ballet obsession (we just started lessons), this would be her idea of heaven. But what about boy invitees? I'm just dying to make some more pom poms too!

Dinner in the Yellow House
 I also adore the look of white meringues. This is a must.


Steaming

My next, more boy-friendly idea is to have a 'cafe' style party. In Australia, it's standard to serve "babyccinos" at cafes. It's a demi-tasse of steamed milk froth with some chocolate powder on top. It looks just like a grown up one. I thought it might be cute to serve them and then give the cups as favours. We could then serve lunch - finger sandwiches etc and have a cafe theme.

What do you think?

Wednesday, August 24, 2011

Freeform Gingerbread Men


Who doesn't love kids' drawings? When I was a kid my Mum and I would make these freeform Gingerbread Men that look just like a cookie version of a drawing! Incidentally, in Australia we do ginger-related baking all year round, not just at Christmas. So today Eleanor and I decided to give it a go. Here's how:


  • 3 cups all purpose flour
  • 1 teaspoon baking powder
  • 2 teaspoons ground ginger
  • 1 teaspoon ground cinnamon
  • 1/2 teaspoon nutmeg
  • 1/2 teaspoon salt
  • 1 stick (125g) butter
  • 3/4 cup packed light brown sugar
  • 1 large eggs
  • 1/2 cup dark molasses
Preheat the oven to 350 degrees F. Sift dry ingredients together. Melt butter and molasses together then add to dry ingredients along with the egg. Mix with a wooden spoon and then get your hands in there to finish off. You might need to adjust the consistency by adding more flour or a little milk. it should be the consistency of play dough.

Now, depending on the age of you kid/s you can help them make the men. Eleanor is 2.5 so I broke off the pieces of each body part (head, body, arms, legs) and told her to roll them into balls or sausages. She then joined them together by pressing them onto the lined cookie sheet. We then used some raisins for eyes. You can use other dried fruits for buttons and other details if you like.

Bake them for about 10-11 mins, depending on what thick they are. When they start to get darker brown around the edges, they are ready.

And then eat. Mmmmmm.

Tuesday, August 16, 2011

To theme or not to theme?


Themed kids' parties are so cool. I loved having Emmett's mustache party at home. Eleanor will be turning 3 (!) in October so I am starting to think about parties.


I think we will make this one fairly small and limit it to kids that Eleanor plays with regularly, as I feel the 3rd birthdays begin to be about the kids rather than the parents (did I say that, LOL?).

We've loved attending everyone's parties so far and each was so different. Holly's was uber-stylish and cute, of course and we have also been to non-themed house parties and one at the Little Gym. Eleanor loved them all. So what should we do?

Eleanor's turning out to be a pretty girly-girl and went crazy over the fairy dress her Nana and Pop brought from Australia. So I think some sort of girly theme is definitely in order, however I don't know if we will be inviting any boys. So I'll have to put some thought into it.

Here are some ideas I'm loving:

In the Hushed Hours Via The Sweetest Occasion
LOVE the antique-colours and garland! This party is to die for!

The Sweetest Occasion
 Um, what is there not to love about individual hats in bright colours?

Martha Stewart
Is this not the most gorgeous girly cake you've ever seen?

Do you have a big birthday bash for each of your kids' birthdays? Do you theme them, have them at a party place or do a down-home thang?


Tuesday, July 26, 2011

Weekend Happenings and Reno Updates

How was your weekend? Like Leila, I spent some time at the local pool, mostly to allow my husband to get some work done:

Yes, that's the backsplash! which means a full kitchen tour is around the corner. Remember when I was waffling between dark and light grout for the kitchen? These groutless tiles kind of make me want to go dark and dramatic but I'm still unsure. The room is bright enough back there to handle it I think, but I have practiced so much restraint so far making neutral design decisions to make this house attractive to future buyers,  I don't want to stop now that I can see a future reno on the horizon (hint: we are about to outgrow this house!). 
Other than the backsplash, we had tiny pedis by the pool (AKA occupy toddler while big brother is in swimming lessons):

Any ideas on getting two year olds to not curl their toes under after the polish is on? She doesn't seem to mind, but I notice it!
I also had some fun playing with my new gadget:

We tested a cookies and cream recipe this weekend but are now considering moving on to chocolate bars...update soon. This machine is a godsend for parents of children with nut allergies!
Well, that was the extent of my weekend, I hope you enjoyed yours as well!

Monday, May 30, 2011

Naturally Coloured Pink Buttercream Frosting!


Disclaimer: The photo is supposed to look "nostalgic" and was a pretty poor attempt at using Photoshop. So please excuse it!

On with the post...

A couple of weeks ago it was a special little girl's birthday and we brought a cake to a playdate. A pink cake was requested and I had run out of food colouring, plus I don't really like giving fake colour to my kids. So I made this really delicious pink frosting using strawberries to colour it! It was also much more delish than food-coloured stuff!

Strawberry Buttercream

What you'll need:
  • 1/4+ cup strawberry puree (put fresh strawberries in a food processor and blend until smooth)
  • 4 cups Confectioner's/Icing Sugar
  • 1/2 cup (1 stick) Unsalted Butter, softened
 Put your butter and sugar in either a food processor or stand mixer and mix until well blended (a few minutes). Add your puree gradually (while mixing) until the frosting is light, fluffy, pink and tasty.

The cake pictured above was a Buttermilk layer cake and I put some sweetened strawberry puree (left a little chunky) in the middle and then slathered the outside with the buttercream. It turned out better than I could have imagined. Licking the bowl was the best part!

Monday, May 16, 2011

Mustache Party for my one year old!


The pics from the great Mustache Bash are FINALLY done!

Even though the lead up was fairly stressful, I had a great time. I blogged about the invitations, goody bags, mustache crayons, party mix and inspiration, but here is the proof that it actually did happen!

Admittedly, I went a little overboard with the theme, but if you're going to get wet, you may as well go swimming!


Here's my take on the mini-bunting craze. Yup, mustaches! I just hot glued some die cuts to some bakers twine and suspended it between 2 straws.


...and the mini milk bottles (Italian juice bottles, cleaned and labels soaked off)

Mo toothpicks (excuse the back side of them here)


I made these mo' plates by printing a gif onto some clear mailing labels, then cutting them out and sticking them onto clear plates. The napkins were done using one of the stamps I made.

The menu (for about 30 people!!) was:
  • Chocolate Cake (also made a sheet cake because there were so many people)
  • Popcorn in popcorn bags
  • Asparagus and Zucchini Frittata
  • Falafel with Tahini dip
  • Veggies
  • Blue Cheese Dip
  • Hummus
  • Grissini
  • Watermelon in the shape of mustaches (cookie cutter)
  • 2 types of mustache shaped cookies - I made some and a dear friend brought some. Her's were tastier
  • Melting Moments (a delish Australian cookie, they melt in your mouth)
  • Sandies, courtesy of Mark (Rachel's husband)
  • Leb Bread chips - Lebanese bread brushed with EVOO, sprinkled with Lemon Pepper, then baked
  • Party Mix
  • Clementines
  • Chocolate milk
  • Various other soft drinks


...And here's the birthday boy, enjoying some falafel and chocolate cake. Mmmmm, good combo, Mum!

Tuesday, April 26, 2011

Cheril's Mom's Addictive Party Mix

This is also known as: "OMG! What is this stuff?!"

The recipe comes from my friend Cheril. Or, more precisely, Cheril's mom. I met Cheril when I was doing my undergrad and she was on exchange from Hawaii. Her mom would send the most amazing care packages and they would invariably include this crack party mix. I have never met Cheril's mom but I think I love her. Here's her recipe - it's a bit tweaked, but basically true to the source.

It comes with a warning though: put it out in quite a few bowls because some people at my parties have been known to cradle a bowl of it in their laps and hoard it.

You will need:
  • 2 boxes of Crispix cereal (or Chex if in the US) - the regular, not ginormo size.
  • a big bag of straight Pretzels, low salt if possible
  • some almonds if you wish. I don't usually do it because of those nut allergy people
  • 1.5-2 cups of sugar
  • 5 (yes you heard me, 5!) sticks of butter (1.25lbs!)
  • a good slug of Worcestershire sauce - about 4-5 Tbs?
Can I digress here? In Australia, our sticks of butter are 250g, and when I first made this recipe I used 5 Aussie sticks - that's 2.5lbs of butter. It was quite rich, LOL.

Preheat your oven to 300 degrees F and melt the butter, sugar, and sauce together. Dump your cereal, buts and pretzels into 2 or 3 large baking dishes and pour the sauce evenly over the mix, tossing to coat evenly. Then stick it in your oven, checking and tossing it every 10 mins. It will take about 40 mins in my experience, but be careful, because it burns easily and fast! You want it golden brown. Let is cool and then pack it away until your party. Don't make it too far in advance because you'll eat it all and have to make some more.

Here is a close up:
 

 See how some of the bits are really, really encrusted with that sugary, buttery stuff? Those are the pieces you want to make sure you get!

And if you ever go to Hawaii, see if you can make a date to meet Cheril's mom and thank her for me!

Friday, April 22, 2011

Moustache Party Goody Bags


I really wanted to create some special goody bags after seeing how much Eleanor loved the ones at Holly's party. I also really hate junky stuff so I decided to go a bit minimalist but have just one main toy in there (but a good one).

I bought some tiny lunch sacks and made a little stamp which I stamped near the top, folded the top over and punched a hole and tied it up with some baker's twine.

The contents of the bag were:
  • Fun sized Smarties
  • about 4 Silly Bands
  • 1 or 2 Mustache crayons 
  • a Matchbox car with mustache detailing
  • I decided not to include the cute mo buttons because they were a perfect choking hazard


Here's a close up of the detailing on this particular car. I just used a paint pen and freehanded it. Each car was different so I had to customize the placement. One the lighter coloured ones I just used a Sharpie.

Wednesday, April 20, 2011

How to make moustache crayons


Mustache shaped crayons for the goody bags? Yes please! 

Inspired by homemade by jill's race car crayons, I decided to get really crafty and make my own. I ordered a mustache chocolate mould from here and more or less followed jill's directions.

Here's how I did it:

 The hardest part was actually taking the crayons out of the paper. I made a slit down the side of the crayon using an exacto knife or craft blade.

Then took my crayons out

I grouped all like colours together, so I had a pink/red group, a blue/purple one and so on.

Then I waved my magic wand and turned the pink crayons into orange and yellow ones. Um, yep.

I was far to lazy and unsafe to do the double boiler technique so I went to a thrift store and bought the cheapest pot they had (50c!). It was dinged and dented and was fantastic! I put it on medium heat and in a few minutes (with some stirring using a chopstick) I had...

this!

Now, please don't hate me too much because I forgot to take a pic of the most important bit - the crayons actually in the mould inself. Instead of an excuse, just take this warning - don't leave the room and start facebooking while you have your melty crayons on the stove unless you want a house full of smoke. And then try and remain calm while you put the pot of stinky crayon soup on to your porch while trying to remove your birthday boy from the toxic (or non-toxic?) fumes.

Anyway, just pour the soup into your mould and put it in the freezer for a while. When they are hard (about the same time it takes to peel and melt your next colour) they will pop right out with no residue! I just wiped out the pot with a paper towel between colours and went from light to dark.

The irritating thing about my mould was that it only had 4 slots so if you're just doing it for fun (rather than a specific theme) I recommend choosing a mould with many slots.

And there you have it!